Install Gibbon on Ubuntu Server 20.04
Gibbon is an open source school platform project designed to be flexible, extensible and themeable, whilst aiming to help teachers to do their jobs. It aims to provide all schools, no matter their size or resources they have, with the systems they need to provide effective learning, teaching and school management. Gibbon is built using PHP, MySQL, jQuery, Git, Atom and other open tools.
I have done this step-by-step “How To” to help an academy so they can benefit from Gibbon. This particular academy already have an empty physical server to host the app but for this documentation, I used the following:
o Ubuntu Server 20.4 ISO
o Ubuntu Server 20.04 VM on Oracle VirtualBox
– RAM 2GB
– vDisk 32GB
– Bridged network interface
o 5 Mbps Internet connection (not much but served it’s purpose)
Prep-work
o Download Ubuntu Server 20.04 ISO
Download the server ISO from the Ubuntu Server download page
o Create the Ubuntu Server 20.04 install USB
For this, I used balenaEtcher on my Windows 10 PC.
I opted for the portable version which you can choose by clicking the drop-arrow icon.
It is important to run the app as Administrator. Otherwise, you will get a privilege error.
Ubuntu Server Install
o Insert the USB installer into any available working USB port of the physical server
(I will simply refer to this as just “server” hereafter)
o Turn on the server, then get into the BIOS/EFI interface and configure it to boot from USB
– at times, you will need to disable Secure Boot too
After you save the settings, the server will reboot
o On reboot, if all goes well, the server will boot from the USB installer.
On this install page, select English and press the Enter key to continue.
By the way, you will need to press the Enter key to execute a command.
o From here, follow the screenshots below but bear in mind that you need to substitute values or entries that apply to you.


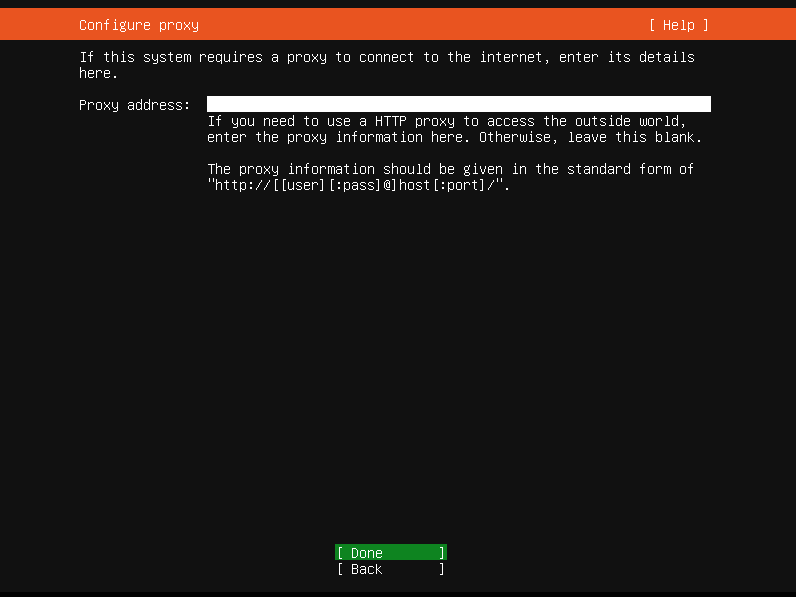


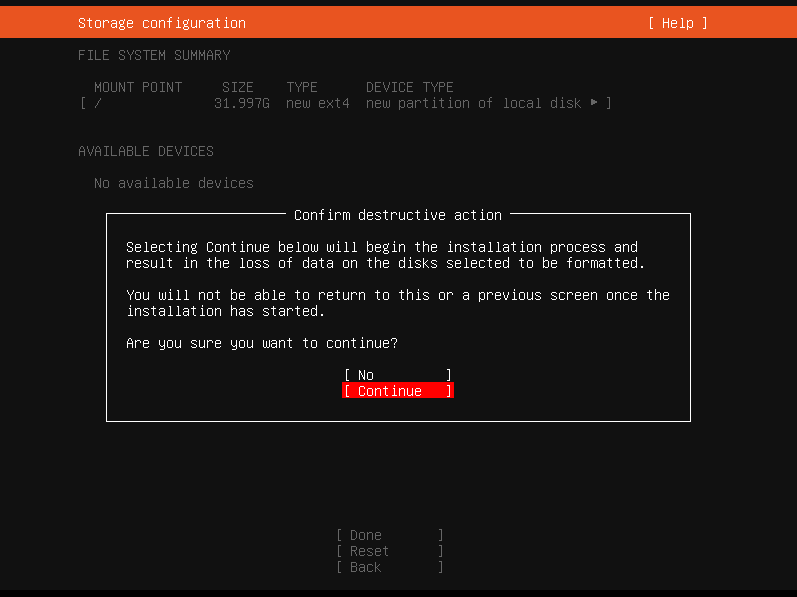


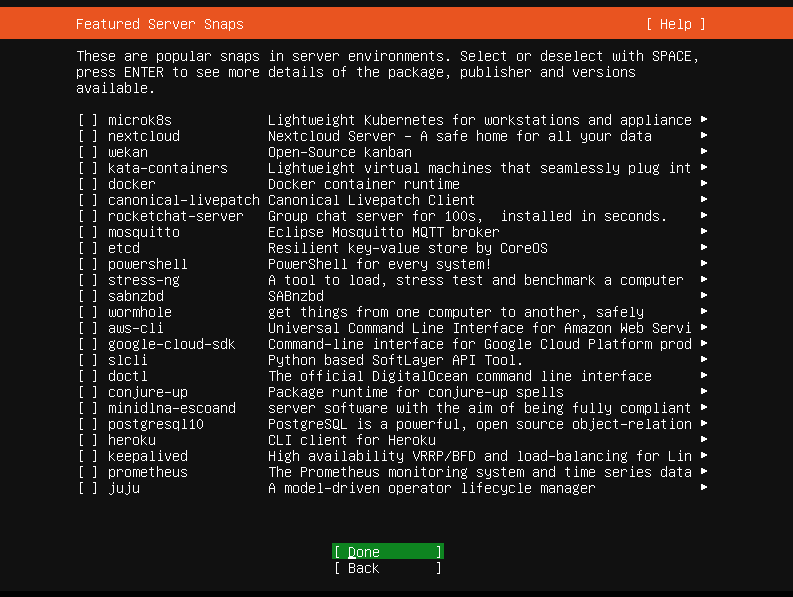
You will have to wait until the installation completes so be patient.
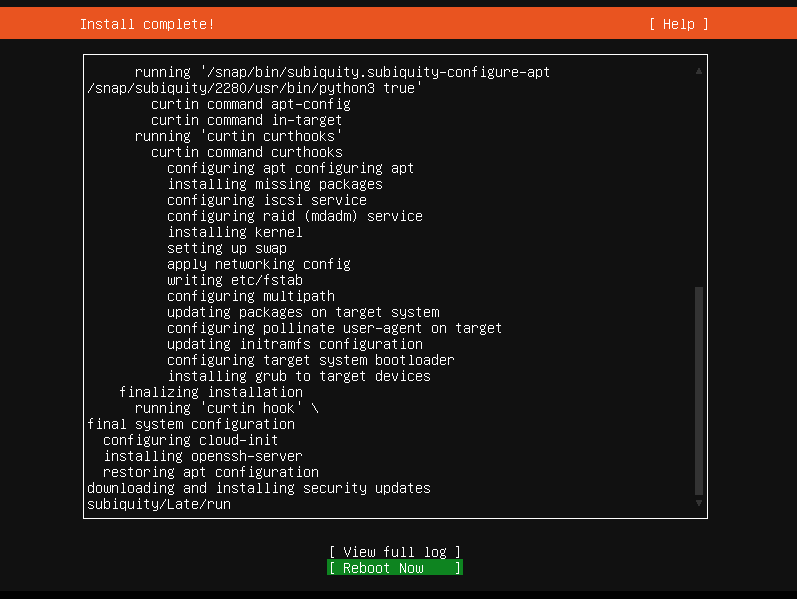
Press Enter to reboot the server.
You will be prompted to eject or remove the USB installer; do so then press Enter.
After the reboot, you probably will see something like this:

Don’t be alarmed. Just hit Enter.
Login using the user credentials you created during the install process.
Setting Up LAMP
o To be sure the server is up-to-date, execute the following commands:
sudo apt -y update
sudo apt -y upgrade
sudo apt -y –fix-broken install
Enter the user password when prompted for it.
o Verify the server’s IP address and take note of it. Execute command ip address to do this.
o Exit from the server then go to your PC. Assuming you’re using a Windows PC, download the latest Putty from the developer’s website; click HERE to download.
o Launch the Command Prompt as Administrator.
Execute command notepad C:\Windows\System32\drivers\etc\hosts.
Edit the file like below:

Remember to enter the actual IP address of your server.
o Close the file then select Save and verify connectivity to the server, execute command ping gibbon.nma.edu
If all is good, you will have result like below:
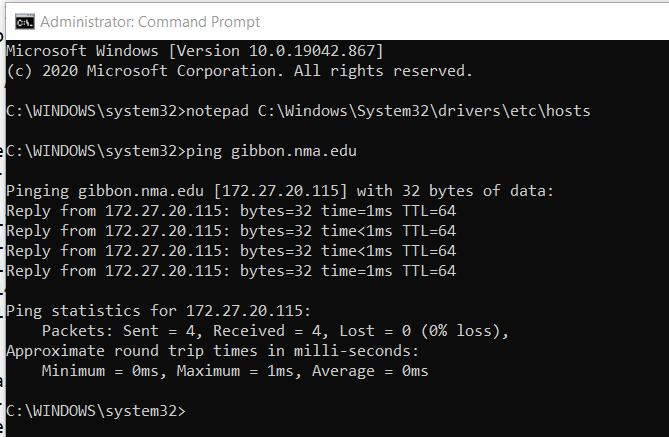
(Please note that this domain name is only local. Should you intend this to be public, have it registered)
o Go to the Downloads folder, launch Putty.

In Putty, type the server IP address or the host name in the Host Name field; click Open then use the same user credentials in previous procedure. Select No when prompted.
o Copy the string of command below and paste it on Putty by doing a right-click of your mouse
sudo apt -y install apache2 mariadb-server mariadb-client php libapache2-mod-php php-common php-sqlite3 php-mysql php-gmp php-curl php-intl php-mbstring php-xmlrpc php-gd php-bcmath php-xml php-cli php-zip unzip git
You will be prompted for user password; please do so. This process downloads and installs the LAMP packages and will take time depending on your Internet connection so be patient.
Tasks like copying and pasting commands is easy when working remotely on the terminal; this is why I prefer it when working on our servers.
o Execute this command sudo apt -y –fix-broken install to make sure we’re not missing any software packages.
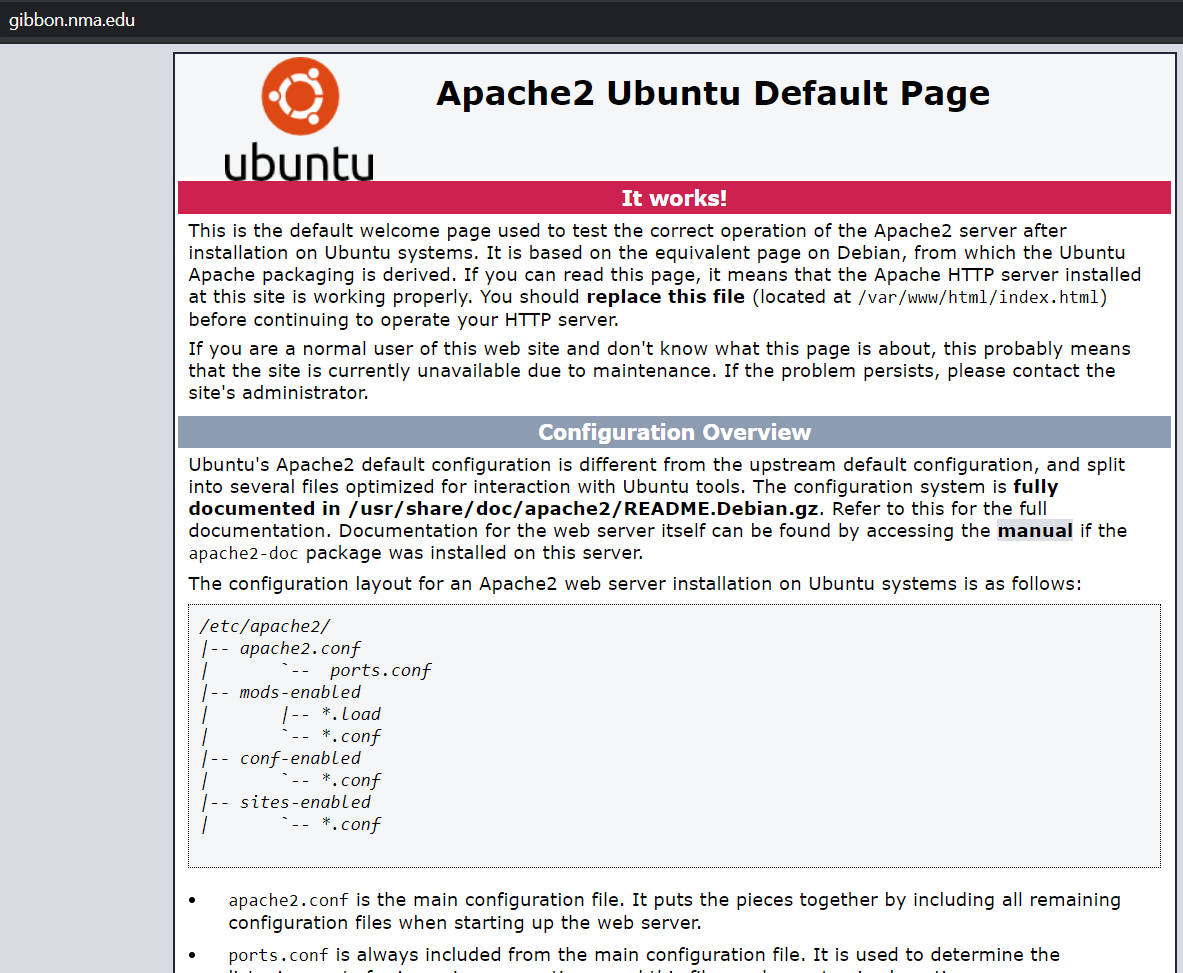
o To verify that the web server is installed and running, launch your web browser and point it to http://gibbon.nma.edu.
You should have something like this:
o We now need to edit a few PHP parameters for use with Gibbon.
Execute command sudo nano /etc/php/7.4/apache2/php.ini
This opens the file with the Nano text editor.
Proceed to change these parameters:
memory_limit = 384M
upload_max_filesize = 200M
post_max_size = 256M
max_file_uploads = 100
Important: Value must be larger than number of students in a class
max_execution_time = 120
date.timezone = Asia/Manila
Relevant nano keys:
CTRL+W <<< launches the find/search entry
CTRL+X <<< exits the app. Press Y to confirm save changes
o Next, we create and prepare a database for use with Gibbon. Execute commands:
sudo mysql
CREATE DATABASE gibbondb;
CREATE USER 'gibbonuser'@'localhost' IDENTIFIED BY 'gibbonpass';
GRANT ALL ON gibbondb.* TO 'gibbonuser'@'localhost' WITH GRANT OPTION;
FLUSH PRIVILEGES;
EXIT;
Entries in red, must be changed to what is relevant to you; I just used those to document this procedure.
Gibbon Install
o Download latest Gibbon package from offcial github repository.
Execute command wget -c https://github.com/GibbonEdu/core/archive/v21.0.01.zip
o Extract the downloaded file; execute this command unzip v21.0.01.zip
o Next, move the extracted files to /var/www/html/gibbon
Execute command sudo mv core-21.0.01 /var/www/html/gibbon
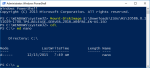
o Verify if move is a success.
Execute ls /var/www/html.
You will see something like this:

o Proper permission must be assigned on the Gibbon directory.
Execute commands:
sudo chown -R www-data:www-data /var/www/html/gibbon/
sudo chmod -R 755 /var/www/html/gibbon/
o Configure Apache web server for Gibbon use.
Execute sudo nano /etc/apache2/sites-available/gibbon.conf
This opens a blank file; populate it with this:
ServerAdmin admin_email@mail_domain
DocumentRoot /var/www/html/gibbon
ServerName gibbon.nma.edu
Options FollowSymlinks
AllowOverride All
Require all granted
ErrorLog ${APACHE_LOG_DIR}/error.log
CustomLog ${APACHE_LOG_DIR}/access.log combined
RewriteEngine on
RewriteBase /
RewriteCond %{REQUEST_FILENAME} !-f
RewriteRule ^(.*) index.php [PT,L]
Press CTRL+X <<< exits the app. Press Y to confirm save changes
o Enable the newly created config file
Execute sudo a2ensite gibbon.conf
o Enable apache rewrite & restart the Apache services
sudo a2enmod rewrite
sudo systemctl restart apache2
o Now we're ready to install Gibbon.
If you still have the browser window open when you tested for Apache, simply refresh the page. Otherwise,
point your web browser to http://gibbon.nma.edu.
This is Page1 for the web GUI Gibbon installation. Change the System Language to English – United States
you can leave this unchanged if you wanted to use the default.
Click Submit to continue.
o Fill the form with the following info:
Database Server: localhost <<< don’t change this
Database Name: gibbondb
Database Username: gibbonuser
Database Password: gibbonpass
Install Demo Data: Yes <<< you need this to learn about the system
Note that Database Name and Database Username are what you specified in the database creation.
Click Submit to continue.
o Fill the form with the following info:
Under User Account
Surname, First Name, Email, Username, Password
Must be credentials of the personnel who will maintain the system
Under System Settings
Base URL: Same as the web address you used on the browser. Please note that this is only available
on campus unless hosted on outside hosting site with registered domain name.
System Name: You can use Gibbon or another name of your choice
Install Type: Production
Other options will be more confusing especially if you're not a developer since debugging notifications will pop-up from time to time
Under Miscellaneous
Country: Philippines
Currency: Philippine Peso
Timezone: Asia/Manila
Click Submit to continue.
o Click go to your homepage, login, and start using Gibbon.
Use the user account credentials you entered on Step 3 of the web GUI installation page to login.
o Visit the Gibbon Support YouTube page.
Learn from the Gibbon Training Day 2021 series.
Hope this helps… 🙂
Nano Server 2016 TP4: Sneak Peek – Part 1
First, I would like to thank those who attended PHIWUG‘s TechNet event last December 10, 2015 (Thursday) at Microsoft Philippines. Am sad we (John Delizo, Rene Barcelona, Milo Pacarra) didn’t have more time to present each topic in detail but as promised, here’s a step-by-step guide of my Nano Server 2016 TP4 sneak peek.
Disclaimer: Nano Server is a work in progress and is far from done but for me, it’s an opportunity for tech-discovery.
==============
What you need
==============
- a 64 bit PC (perhaps an Intel Core 2 Duo or equivalent)
- with 4GB RAM but better if you have more although you can probably try this with at least 2GB
- running a 64 bit OS, preferably Windows 10 Pro or Enterprise
- has a working virtualization hypervisor preferably Hyper-V (for VirtualBox, you may need to convert vhd to it’s native format)
- free disk space approximately 4GB or more so you can play more; “play more” is relative to RAM “pa more” 😀
- downloaded Windows Server 2016 Technical Preview 4 ISO; will be referred here as WS12TP4 ISO. If you still don’t have it, download it from HERE. You will need to Sign-In though.
- optional: 16GB or 32GB USB flash drive (we’ll use this on the next blog post)
===========
Jump Start
===========
- Launch PowerShell as Administrator.
- Mount the downloaded WS12TP4 ISO. In the PowerShell prompt, type Mount-DiskImage x:\WS12TP4.iso (x: is the drive and path where the ISO is located while WS12TP4.iso is the actual WinServer 2016-TP4 ISO file) and press the Enter key.
e.g. Mount-DiskImage E:\Downloads\ISOs\MS\10586.0.151029-1700.TP4_RELEASE_SERVER_2016_X64FRE_EN-US.ISO
By the way, in a command line, you need to press the Enter key after you type a command to execute.
- Due to Windows 10’s implicit “Restricted” PowerShell script execution policy, you will need to explicitly set said policy to “Unrestricted” to run the PowerShell scripts we’ll use. Still in PowerShell, execute the command Set-ExecutionPolicy Unrestricted
- To verify if the operation was a success, do a Get-ExecutionPolicy -list. You will see something like this:

- Navigate to the root directory and create a folder named nano. Execute cd\ then md nano.
See screenshot:
- Change drive to the mounted ISO image and change directory to NanoServer.
- Copy the PowerShell script file to your nano folder.
e.g. copy *.ps1 c:\nano
- Change drive and directory to your nano folder.
See screenshot including previous commands:

- The PowerShell module that come with the WS12TP4 ISO did not include the packages I needed so I tweaked it. Click HERE to download the module; don’t worry, it does not have extra payload 🙂
- After the download, change .doc file extension to .psm1 then copy the module to your nano folder.
- If you’re currently not in your nano folder, please do so; import the module thereafter. Execute Import-Module .\NanoServerImageGeneratorRevised.psm1 -Verbose. If successful, you should see something like this:

- The stage is now set to build our Nano Server image. We’re going to build an appliance web server for use on Hyper-V with a pre-determined IP configuration (I have mine via DHCP reservation) but you can manually assign below parameter values as shown in the command later:
- Address – 172.32.0.223
- Netmask – 255.255.255.0
- Gateway – 172.32.0.1
Packages to be included are:
- Defender – “Kailangan pa bang i-memorize yan?”
- PowerShell Desired State Configuration (DSC) – for management purposes
- GuestDrivers – base drivers for Hyper-V
- Storage – for WORKGROUP and DOMAIN connectivity and access
- IIS – Microsoft’s premier web server
- ReverseForwarders – support of various developer application platforms (i.e. Ruby, Node.js, PHP, MySQL, etc.)
When you’re ready, let’s get it on!!! Still in the nano folder, execute this command:
New-NanoServerImage -MediaPath x:\ -BasePath .\Base -TargetPath .\Nano.vhd -ComputerName “your_desired_server_name” -InterfaceNameOrIndex Ethernet -Ipv4Address 172.32.0.223 -Ipv4SubnetMask 255.255.255.0 -Ipv4Gateway 172.32.10.1 -GuestDrivers -Storage -ReverseForwarders -Defender -DSC -IIS -EnableRemoteManagementPort -Language EN-US
Remember to substitute x: with the assigned drive letter of the mounted WS12TP4 ISO image; do this for your_desired_server_name and the IP configuration too.
You will be prompted for a password immediately after executing the command; this will be the Administrator password you will use to login to the server’s recovery console. Initially, you will see something like this after executing the command:
When the image building is complete, you will see something like this:

By the way, if you get an error about a folder not found, just create a subfolder in your nano folder named Base (e.g. md Base).
One other thing, you may need to restart your computer, mount the ISO, import the PowerShell module then do the New-NanoServerImage command above. Sometimes, PowerShell will complain about not finding the media path; weird 😕


====================
Running Nano Server
====================
- Assuming you have Hyper-V running on your machine, we will create a new VM. Before executing the command below, let me tell you that I have a virtual switch named “LAN vSwitch” and a custom VM repository name VirtualEnterprise in drive E:. So, still in PowerShell, create a VM with this command:
New-VM -Name ‘Nano Server’ -MemoryStartupBytes 512MB -SwitchName ‘LAN vSwitch’ -VHDPath ‘C:\nano\Nano.vhd’ -Path ‘E:\VirtualEnterprise\Nano1’ -Generation 1
If the operation is a success, you will see something like this:
- Let’s start the VM and have a glimpse of our home-brewed Nano Server 2016 TP4. Do the following in PowerShell:
- Verify is newly created VM is listed
Get-VM - Start the VM
Start-VM ‘Nano Server’ <<< remember, Nano Server here is the name of your newly created VM - Verify if VM is up and running
Get-VM - Connect to the VM
vmconnect localhost ‘Nano Server’
The VM console should popup
For more Hyper-V cmdlets on Windows Server 2016 TP and Windows 10, visit Microsoft’s TechNet library HERE.
- Verify is newly created VM is listed
- In the Nano Server Recovery Console, key-in administrator in the User name:field and press the Tab key.
- Type the password in the Password field and press Enter. The user credentials will be processed and you will be presented with the system configuration summary.
- Take note of the IP address; it’s the address you pre-determined
- Just to verify if IIS is truly installed and running, launch your favorite web browser and navigate to the nano server’s IP address.
You should have IIS’s startup page.
===========================================
Remotely Manage Nano Server via PowerShell
===========================================
- Go back to the PowerShell prompt.
- We will need to explicitly add the Nano Server’s IP address in our computer’s list of Trusted Hosts. You can do this by issuing this command:
Set-Item WSMan:\localhost\Client\TrustedHosts “172.32.0.223” <<< substitute the IP address with the one displayed in your Nano Server Recovery Console
You will be prompted for the list modification action. Press the Y key for Yes.
- For convenience, we will write a PowerShell script for our nano server remote management. Launch Notepad, copy and paste the content below then save the file in your nano folder as nanoconnect.ps1.
# My Nano Server remote management connection script
$ip = “IP_address_of_Nano_Server”
$user = “$ip\Administrator”
Enter-PSSession -ComputerName $ip -Credential $userNote: Please replace IP_address_of_Nano_Server with the actual Nano Server IP address (e.g. $ip = “172.32.0.223”)
- Before trying our PowerShell script, launch the Command Prompt and ping your nano server.
You will probably get the same result as below:
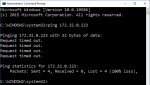
It’s not that the server is not running or offline; it’s a security feature since Windows XP SP2 😀
- We now will try to use our PowerShell script. Go back to the PowerShell prompt, type nanoc and press the Tab key then the Enter key.
A popup dialog will appear.
- Key-in the Administrator password and click OK.
Notice that the PowerShell prompt has changed; it added the server’s IP address. You now are inside your nano server. - Let’s perform our first Nano Server system administration task. Execute tzutil /g
The command will display the current time zone of the system. - If the time zone does not match yours, do tzutil /l to display all the valid time zones you can use.
- In my case, it’s “Singapore Standard Time” so I’ll do:
tzutil /s “Singapore Standard Time” - Do tzutil /g again to verify if the change was a success.

============================
Enabling ICMPv4 Echo Reply
============================
- Now let’s resolve our first Nano Server network issue; ICMP echo replies via PING. Use the commands below:
Import-Module NetSecurity
New-NetFirewallRule –DisplayName “Allow Ping” –Direction Inbound –Action Allow –Protocol icmpv4 –Enabled True - Verify if the new firewaull rule is listed. Use the command below:
Get-NetFirewallRule –DisplayName “Allow Ping” - Now verify if the rule works, go back to the Command Prompt and ping the nano server again.
Well, for the sake of “awesomeness”, I explicitly added the nano server’s IP address in the hosts file of my PC. Here’s what I got

- For security reasons, if you want to disable the rule, just use this command:
Set-NetFirewallRule –DisplayName “Allow Ping” –Enabled False

==========================
Enabling File and Printer Sharing
==========================
- Check if the file and printer sharing service is enabled; do this by going back to the PowerShell prompt and use this command:
Get-NetFirewallRule -DisplayGroup “File And Printer Sharing”The firewall rules related to the service will now be listed. Can you tell if the service is disabled?
You must have eagle’s eyes; you’re right! All the Enabled section below DisplayGroup and Group has a value of False. - Assuming the service is disabled, use this command to enable it:
Set-NetFirewallRule -DisplayGroup “File And Printer Sharing” -Enabled True - Let’s try to access the server’s C: drive. Go back to the Command Prompt and use this command:
net use z: \\server_ip_address\c$You will be prompted for username and password; use your nano server’s administrator credentials.
- Still in the Command Prompt, change drive to Z: then issue the dir command to list contents just to verify the drive mapping was a success.
We’ve done this to set the stage for Part 2 😀 - To disconnect your remote management session, go back to the PowerShell prompt and issue this command:
Exit-PSSession - To shutdown the VM for now, use this command:
Stop-VM ‘Nano Server’
So there you go. Now pat yourself on the back for a job well done.
Truth is, after more than 30 numbered instructions and you followed it through, congratulations is an understatement. I’d rather tell you that YOU ROCK!!! 
See you in Nano Server 2016 TP4: Sneak Peek – Part 2… 
KB3122947 install error
The past two days left me baffled with a Windows 10 update that couldn’t install. At first I thought it was because of my slow internet connection but turns out, the update has actually been fully downloaded (C:\Windows\SoftwareDistribution\Download\c4a1b8896ce9fbfea96c1ee6890d52a5\windows10.0-kb3122947-x64.cab).
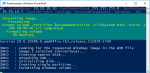
Out of curiosity, I attempted to apply the update manually using DISM; surprisingly it worked!!!
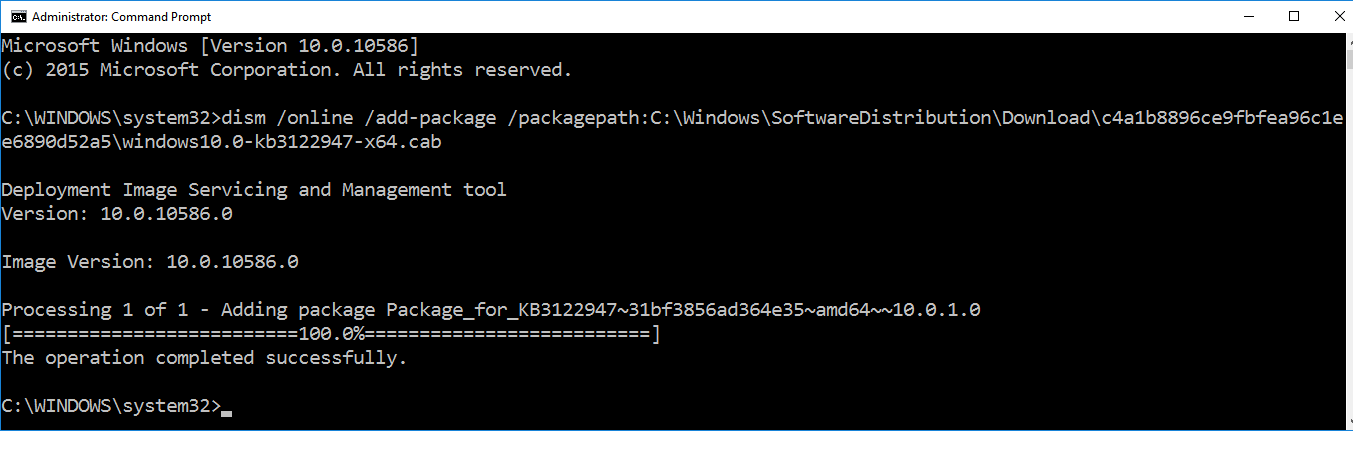
You can try it by launching the Command Prompt as Administrator then type this command and hit Enter:
dism /online /add-package /packagepath:C:\Windows\SoftwareDistribution\Download\c4a1b8896ce9fbfea96c1ee6890d52a5\windows10.0-kb3122947-x64.cab
Here’s a snapshot of what I did:
Hope this helps other who encountered the same issue ![]()
Windows MultiPoint Server 2012: Mystery of the “Create a MultiPoint Server Station, ‘Press B'”
I know, it sounded like a Scooby Doo episode title but it really is in a way.
Windows MultiPoint Server 2011 was awesome; it just works. After recently purchasing the newer MP Server 2012 Premium, our IT Director installed the OS on a newly assembled rack-mount server. The day after, he asked me to check the server for hardware issues because the installation appeared bad. I can’t blame him; I went to the server room and checked the server. Message on the screen says “Create a Multipoint Server Station, Press ‘B’.” Well, that was exactly what I did but nothing happened; changed the keyboard, nothing… I reinstalled the OS which went well then after a reboot, showed me the same message; am stuck.
Anyway, I plugged-in a USB hub with a mouse and keyboard… BOOM!!! It worked.
Strange, but it worked; that’s all that matters… 
Thank you AIIAS Graduate School
Last 27 February 2015 at the AIIAS Computer Laboratory, the Graduate School hosted an event titled Staying Safe Online; I am honored to speak on the event. My topic was titled “Anatomy of Cyber Attack” which, according to the attendees was timely.
The event was attended by students from the Graduate School and Seminary who are taking their masters and doctoral degree at AIIAS (Adventist International Institute of Advanced Studies).
I finally was able to access the inaccessible SD card to retrieve the photos of the event.


Though late, I still find the need to thank AIIAS for the speaking privilege.
Thank you very much…
Project Spartan arrives…
After a day of downloading the update, my machine finally runs Build 10049 with the anticipated Project Spartan. Here’s a snapshot:
 .
.
The browser loads web pages faster than usual but right-click context menu for image linking is not available. I had to use another browser to link the a smiley you see below.
The Hyper-V UI, however, is still terrible; here’s a snapshot:
 .
.
Still have to explore other significant changes in the new build… 
Windows 10 TP Build 10041 now available for Fast update settings
While having my laptop connected to the network last night, it all of a sudden rebooted then displayed the Windows 10 Technical Preview upgrade installation. My machine is now running Build 10041. Read more about this new build HERE.
Enjoy the new build!!!
Restore F8 Safe Mode in Windows 8.x and Windows 10 TP
Pressing F8 to go into Safe Mode in Windows became a regular routine for those who needed to perform a quick fix until the advent of Windows 8.x. I have to admit that it was extremely frustrating not being able to invoke Safe Mode by simply pressing F8 during Windows start-up. To restore F8, launch the Command Prompt as administrator and type the command below and press Enter thereafter.
bcdedit /set {default} bootmenupolicy legacy
Restart your computer and test if it works for you.
Hope this helps
Windows To Go: Served Fresh Anytime, Anywhere (The Unofficial Way)
Back in 2009, I wrote a blog on how to install and run Windows 7 from a USB flash drive; doable, but it sure was quite a challenge. It reaped both success and failure to those who tried the procedure.
Today, with the advent of Windows 8.x, it is out-of-the-box possible to install and run the OS from a USB flash drive via Windows-To-Go but with certain conditions:
- You can only use Windows 8.x Enterprise Edition.
- You have to use a certified Windows-To-Go compatible USB flash drive.
You can read more about the official Windows-To-Go HERE.
What we are about to do is an unofficial version of Windows-To-Go using an non-certified USB flash drive therefore is unsupported by Microsoft and that you will be doing this at your own risk and pleasure  .
.
There are a number of scenarios where this version of Windows-To-Go can be used but let me just cite two that I consider essential:
- You can recover data from a corrupted or damaged Windows machine without removing the hard drive prior to reinstallation or if you do the “Insane” method, from a MacBook Pro.
- You can effectively purge your existing Windows machine of malware by running the anti-virus application from Windows-To-Go.
Two methods will be presented here; “Sane” and “Insane”.
SANE METHOD
What you need:
- A host computer that supports booting from a USB drive with a working Windows 8.x environment (am using 8.1 Enterprise).
-
Windows 8.0 Enterprise install DVD or ISO. You can download the evaluation ISO from Microsoft; click HERE.
Why not Windows 8.1 Enterprise? Because it does not readily support this procedure. By the way, it’s best that you use the 32-Bit version so you can use it on most Windows 8.x compliant 32 and 64-Bit computers. -
At least a 16GB USB Flash drive (I used a SanDisk Cruzer Blade 16GB that I got for less than P500.00) – I’d recommend 32GB though so you will have extra space to install more apps you need (e.g. system tools or utilities). You can by the way use an External USB HDD but it’s too bulky and more importantly, does not have the AWESOMENESS and WOW effect of a flash drive
 .
.
- Tons of Patience – especially if you use a USB 2.0 flash drive; installation will be very slooooooowww.
Flash Drive Preparation
- Plug in the flash drive to your computer if you haven’t done it yet.
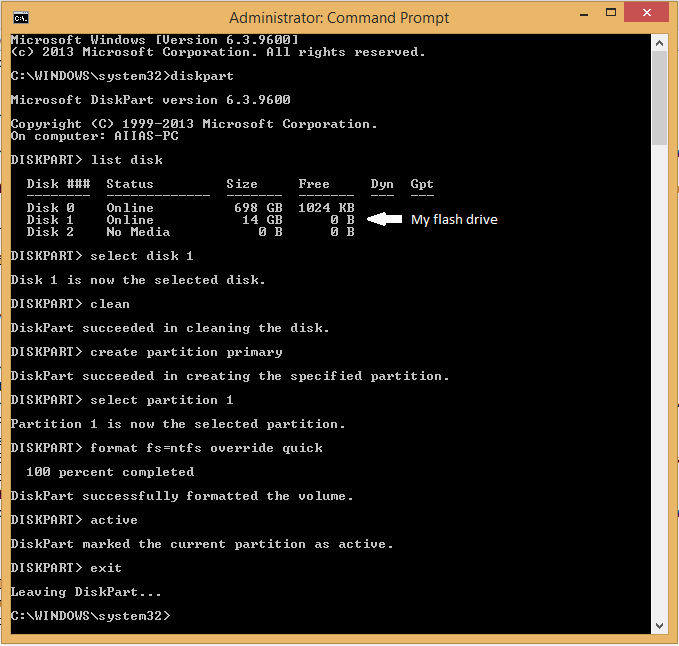
- Launch the Command Prompt as Administrator. Sorry, I haven’t tried doing this as non-Admin.
-
In the Command Prompt, follow the command sequence shown below:
Windows 8.0 Enterprise Installation
-
Load the Windows 8.0 Enterprise install DVD or locate and mount the ISO file (simply right-click the file and select Mount from the context menu).
Take note of the drive letter assigned to the mounted ISO file; in my case, it’s Drive K:. -
Go back to the Command Prompt and follow the command sequence shown below:

If all goes well, you’re ready to test drive your newly created Windows-To-Go.
Windows-To-Go Test Drive
-
Reboot your computer and configure it to boot first from the USB if you haven’t done so.
Depending on the USB type of your computer, it will take some time for the newly installed OS to fully load. -
The Setup Wizard will present you with the Licensing Terms page.
Tick the only checkbox and click Accept. - Key-in your desired PC name and click Next in the Personalize page.
- In the Settings page, click Use express settings to speed up the process.
-
Key-in your desired User Name, Password and Password hint then click Finish.
You will eventually be presented with the Start Screen. -
Pressing Ctrl + D brings you to the Desktop.
You are basically done. But if you want to fully personalize this OS, you will need to activate it.
Two things are required to get this done:- An active Internet connection.
- A valid Product Key.
If requirements are met, proceed to the next steps.
- Launch the Command Prompt as Administrator.
-
Type the command slui 3 and hit Enter.
You will be presented with the Windows Activation page. - Key-in your Product Key.
-
Click Activate.
If the activation is successful, you will see something like this:

- Click Close.
-
Launch the System Properties to verify activation.
You will see something like this:

That’s it, you’re done. Congratulations! 
INSANE METHOD
This method is different in the USB flash drive preparation plus a little extra for the MacBook Pro daredevils.
What you need:
-
Windows 8.1 Enterprise or Windows 10 Enterprise Technical Preview install DVD/ISO.
The good news is, you can download Windows 10 Enterprise TP direct from Microsoft; click HERE. - At least a 16GB USB Flash drive
Flash Drive Prep
-
Convert USB flash drive to Local Disk. Here’s a YouTube video you can follow.
The advantage of doing this is the fact that some motherboard firmware or an OS like Windows will read your flash drive as a local disk instead; it could be possible that you would be enable to install non-enterprise editions of Windows 8.x and 10 or perhaps Windows 7. - When done with the conversion, simply go through the “Sane Method”.
You’re done. Congratulations!
For MacBook Pro Daredevils
- Prepare your Win2GO flash drive with a virtual machine running Windows 8.x if you don’t have a physical Windows machine following the “Sane Method”. I used Oracle VirtualBox on OSX.
-
Download the appropriate Boot Camp Support Software for your machine from Apple. To know more about Boot Camp, click HERE.
If the machine you’re using is in this list, download Boot Camp Support Software 5.1.5621MacBook Air (11-inch & 13-inch, Mid 2011)
MacBook Air (11-inch & 13-inch, Mid 2012)
MacBook Pro (15-inch & 17-inch, Mid 2010)
MacBook Pro (13-inch, & 15-inch, Early 2011)
MacBook Pro (17-inch, Early 2011)
MacBook Pro (13-inch,15-inch & 17-inch Late 2011)
MacBook Pro (13-inch & 15-inch, Mid 2012)
MacBook Pro (Retina, Mid 2012)
MacBook Pro (Retina, 13-inch, Late 2012)
MacBook Pro (Retina, 13-inch & 15-inch Early 2013)
Mac Pro (Early 2009)
Mac Pro (Mid 2010)
Mac Pro (Mid 2012)
Mac mini (Mid 2011)
Mac mini (Late 2012)
iMac (27-inch, Mid 2010)
iMac (21.5-inch & 27-inch, Mid 2011)
iMac (21.5-inch, Late 2011)
iMac (21.5-inch & 27-inch, Late 2012)If the machine you’re using is in this list, download Boot Camp Support Software 5.1.5640
MacBook Air (11-inch, Mid 2013)
MacBook Air (13-inch, Mid 2013)
MacBook Pro (Retina, 13-inch, Late 2013)
MacBook Pro (Retina, 15-inch, Late 2013)
Mac Pro (Late 2013)
iMac (21.5-inch, Late 2013)
iMac (27-inch, Late 2013)
iMac (21.5-inch, Late 2013) - After the download, extract the ZIP file to a folder.
- Plug in your flash drive and copy the extracted folder.
- When done, shutdown your MacBook Pro.
- Press the option key (continue pressing the key) and turn on the machine.
-
Release the option key when the boot disk selection is presented.
You will see something like this:

-
Select your flash drive and hit return.
The next process will take some time but just be patient and wait. - Login.
- Open File Explorer then locate and open your Boot Camp folder.
- Inside the folder, you will see a folder named BootCamp. Open it.
-
Right-click (assuming you’re using a mouse because 2-finger tap does not yet) setup.exe then select Run as administrator from the context menu to launch the Boot Camp installation.
Just follow on-screen instructions.
Again, your patience will be tested. -
When the installation is complete, shutdown the machine.
The reason we do this is that often, we miss pressing the option key at reboot. - Press the option key and turn on the machine.
- Select the flash drive and hit return.
- Login.
-
The Boot Camp service is now running at the background.
You can configure Boot Camp via the icon you see in the System Tray.
Go ahead and explore.
Enjoy your fully MacbookPro-compatible Win2Go… 
Thank You CavSU
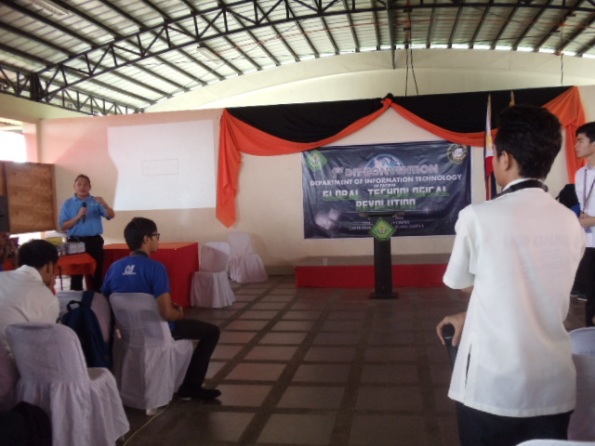
Although this comes late, it never has been forgotten. It was indeed an honor and privilege to be part of a historic event at the Cavite State University – Silang Campus, particularly in the Department of Information Technology. The 22nd of September 2014 marked the first D.I.T. Convention, themed “DIT in Facing Global Technological Revolution”. I was invited as one of the resource speaker where I shared “Windows 8 To Go”. Below are few captured historic moments of the event:
The Event tarp

Me preparing for the Prezo

The Full House (between 400 and 500 students)

Department of I.T. – Head (Madam Beverly Malabag) introducing me.

Presention Proper 1 (Introducing PHIWUG)

Presentation Proper 2

Pre-Demo. Just showing where I placed the laptop’s HDD

The Demo. Showing the laptop running Windows 8 without HDD

Question and Answer 1
Question and Answer 2

Awarding of Certificate with DIT-Head Beverly Malabag and Instructor Brylle Samson

I sure had fun and the audience was truly aswesome
Hope it wasn’t the first and last. ‘Til next time…
THANK YOU, CavSU!!!
